Unlocking The Secrets To Growing Beefsteak Tomatoes In Pots
Tips For Growing Beefsteak Tomatoes In Pots Last updated: 1/16/23 Tomatoes are one of the
Container Gardening is a perfect way to garden in a small space.
Containers, pots, and other barrels can fit just about anywhere ranging from your kitchen countertop to a small balcony.
Containers will allow you to grow most vegetables or herbs while providing you to have complete control over the soil medium.
This is one of the advantages of container gardening because some ground soil may not be ideal.
Check out the latest container gardening posts below or explore all the details you need to get started with gardening with pots.

Tips For Growing Beefsteak Tomatoes In Pots Last updated: 1/16/23 Tomatoes are one of the
There are a vast amount of choices when it comes to selecting a container for your vegetable garden.
Sometimes having too many choices makes it difficult to select the ideal one.
We are here to help you narrow it down, so you can just focus on getting your hands dirty and grow some healthy vegetables for your family and yourself.
We have narrowed down the field of the many choices into a few particular sections of considerations.
We even gave you our Green thumb recommendations for each one to make it even easier.
Bigger is not necessarily better.
However, choosing a larger sized container for certain vegetables will have an advantage.
Plants grown during the summer will inevitably be subject to a higher temperature , therefore, water evaporation is a concern.
An ideal size for most vegetables grown in the summertime is 5 gallons or more.
Of course, if you want to grow some basil on your kitchen windowsill, a 5-gallon container is obviously overkill for such a small plant.
You need to size up the most ideal sized container for your needs.

The BIGGER the BETTER. 5 gallons is the minimum size for most vegetables, but this doesn’t leave room for any mistakes with watering.
10 gallons will give you more insurance with less watering and fertilization since it is a larger volume of soil.
The plant root system will also have more room to spread out, so there’s little to no stress for the plant.
Go with a 10-gallon container and you will have the best success rate.
The shape of the container is important for vegetable gardening.
Containers come in many shapes such as oval or round and square, or rectangular.
The shape is really only important to consider the overall look of your garden.
It may improve the overall look of your garden to have a variety of shapes.
A window planter box may be more rectangular in shape to allow you to easily reach it and expand it across your porch or windowsill.
However, a longer box may not fit best in the corner of your porch. A more square or round garden container would be more suitable for the corner.
The container depth is definitely an important feature to note for certain vegetables such as beets or carrots since they have long taproots.

The deeper containers are the best for most types of vegetables. A larger depth allows the roots to grow down.
Beets and carrots have a large taproot, so these vegetables are some examples of ones that benefit from deeper garden containers.
Herbs and lettuce on the other hand typically have a shallow root system. Ideal containers for these plants don’t require much depth.
Go with at least a depth of 1- 2 feet for vegetables & herbs and 3 feet or more for root vegetables.
The other dimensional shapes are best utilized for your location where you want to keep the containers.
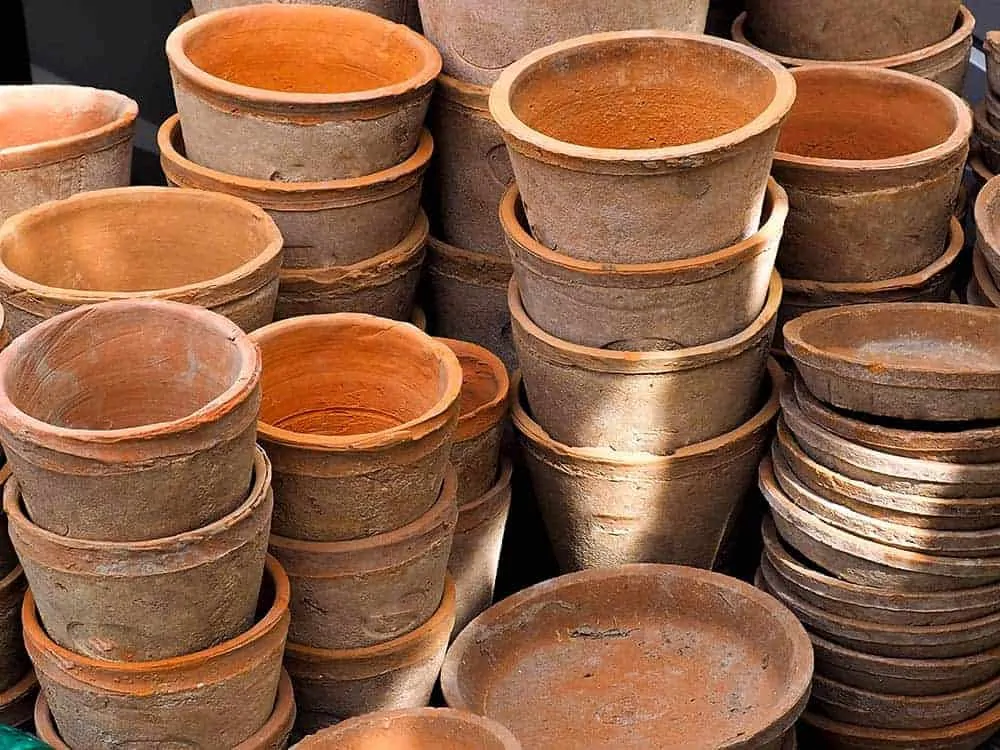
Gardening containers and pots have a variety of materials that they come in. Plastic containers are the most common and more likely economical choice. Quality of the materials is something to really consider.
The more durable containers will last much longer out in the elements. Ceramic or terra pots are usually more decorative and stylish because of the option to paint them.
There are also fabric containers that work just as well. Water evaporation may be less in certain materials such as metal or plastic since that material is less breathable.
It may not be as noticeable in the differences in the materials when it comes to water evaporation efficiency.
Common Garden Containers Materials used:

We recommend the larger fabric material containers for their low cost and ease of portable.
Another benefit is that you can fold them always and store much easier than traditional containers.
The only drawback is that they can wear out much faster than say a plastic container, but still relatively cost efficient to use them each year.
Containers for gardening definitely need to have some type of drainage. This is important because you don’t want the rooting system to rot.
Some plants don’t mind some water near the roots, but some can’t take it. Most plants are best to make sure you have drainage for your garden containers.
Some container that we have come across do not have drainage holes. You may find that you have to drill a few holes in these containers to allow for proper drainage.
Yes, the color of your garden container is actually an important consideration. Remember that these containers may be outside in the sunlight.
A darker color or black garden container will absorb more heat because it does not reflect the sunlight. A lighter or white garden container will reflect the sunlight and thereby absorb little to no heat.
This should be considered because the darker container for your garden may need to be watered more because the water evaporation rate will be greater in these types of containers.
A black metallic garden container should probably not be used unless it is a large container of 10 gallons or more. It is probably best to avoid this type anyways to be on the safe side.
You can also wrap a white cloth around the darker colored containers if those are the only choices of containers you have.
We have some garden containers which are black. We were fortunate enough to get them for free. We try to bury or slightly those containers in dirt or mulch to help keep them cool and out of direct sunlight.
Modern-day container gardeners are fortunate to have many different varieties to choose from. You can check out the section of the different materials used for containers above.
This section will focus more on the overall features of the different types of containers. Think of these as the special considerations for each of them.
Regular Garden containers are your run of the mill containers that have no frills in it. These containers are typically made of plastic, stone, or metal.
There are no special features with these regular containers. Simple containers are better for your gardening in most cases.
These containers are self-watering which requires that you fill them up when they are low or empty. The water finds it way to the rooting system through some automatic mechanism to
The best feature of this type of container is is does not require frequent watering. It is perfect to keep your plants from drying out.
The best ones have larger reservoirs that hold a large volume of water.
Fabric garden containers are our favorite types containers and most used ones for their low cost. A few other benefits of these garden containers are:
Low-cost: You can find these very inexpensive. You can find them typically for about $2-$5 each depending on the size and number of container you purchase (multi-packs)
Portable & Stores Easily: Most have handles and much lighter to move around. The fabric material also allows for easier storage as they fold up.
Better Roots: Prevents roots circling and air-prunes plant’s root structure.
Another benefit of these containers is that it is near impossible to over water your plants. The fabric container is permeable to water, so excess water that is not absorbed by the soil leaks out.
A word of caution if you are concerned about watering your plants often.
You may need to be watered daily in some more temperate zones during the summertime.
This type of container includes the standard 5-gallon buckets that may see in paint stores or in bulk food supply stores. We added this as a type of container because they can easily be found and repurposed to grow your vegetables.
Keep in mind that this type of container should be food grade.
It is best to avoid the 5-gallon containers that are not food grade as the chemicals that comprise the container may leech into your soil.
Honestly, it is probably not much of a concern, but still worth mentioning if you are conscientious about this.
We have seen these types of garden containers modified to include a reservoir and used as a self-watering container. You can make these types of containers yourself with just a few tools and supplies if you like to DIY.
We love growing corn in a container using the 5 gallon buckets. It really is amazing to have 2 or 3 stalks grow from them.

We recommend the larger fabric material containers for their low cost and ease of portable.
Another benefit is that you can fold them always and store much easier than traditional containers.
The only drawback is that they can wear out much faster than say a plastic container, but still relatively cost efficient to use them each year.
Your first priority in any type of gardening should always be your soil. It is the lifeblood of any successful vegetable garden.
Container gardening soil requires a bit more preparation and materials than a raised bed or traditional garden.
The reason for this is that containers tend to dry out faster due to water evaporation. The other reason is the availability of nutrients that can be added to the garden container.
These reasons require that you beef up your garden soil with some other materials to compensate for these minor impediments. A little of this and a little of that and that’s all.
Let’s examine some common container soil ingredients:
Peat moss – This is also called Sphagnum peat moss. It is basically a mixture of different mosses and is widely used because it holds water very well. No nutrient value for the vegetable plants, but still a great medium to use.
Coco Coir – Very similar material to peat moss but it is a more sustainable resource. This soil material is made up of the fibres from coconuts.
Perlite – This material is known for its very high water content. You probably have seen this in most garden centers. It is s the white mini crystal looking pieces in the soil. It feels like a sponge when you squeeze them.
Vermiculite – Another water holding material like perlite. We use this mostly in our seed starting mix, but do add it to some of our containers.
Compost – This is the magic stuff that really helps you get the best tomatoes and peppers in your neighborhood. There are different types of compost such cow manure, chicken manure, home made (maybe grass clippings,vegetable scraps and leaves)
There are several other materials you can add to if you are into making your own vegetable fertilizer mix.
Check out our recommended products page found here.
We have some recommended products for these and other ingredients that you can find on this page here.

Our 3-2-1 Soil Mixture
3 Parts Peat Moss or Coco Coir
2 Part Compost
1 part Vermiculite or Perlite
1/4 cup of garden limestone per gallon of peat moss
½ part of 5-10-5 fertilizer
You need to add some fertilizer to your container gardens a few times during its growing cycle.
It is best to add them prior to adding your plant to ensure you can mix it up and get it close to access the vegetable roots.
One caveat with containers is that the fertilizer can leech out or dilute over time since there is some drainage.
The fertilizer does dissolve given time and it is also absorbed by the vegetable plant.
This means that you may need to add additional compost or fertilizers to your garden containers.
There is no one magic fertilizer recipe that is best for all vegetable plants, but the basic one in our soil recipe above is a good start.
Check the individual plant’s needs as some vegetables may require more nitrogen and some may require more phosphate or potassium.
Vegetables that grow in containers definitely do need to be watered more often than a traditional garden.
You can cheat this by getting bigger containers or self-watering containers to help minimize your water needs.
Ultimately, you still need to water them. You may want to check out the soil dryness until you are comfortable with gardening with containers.
A simple method that I use is by sticking my finger in until I get to my fist knuckles (about 5-6 inches deep).
You will need to water them if it feels dry to the touch.
A good rule of thumb is to water daily when the temperatures are 85 and above.
You can get away with every other day if it is below, but it certainly depends on the weather.
Each vegetable plant has a certain weekly watering requirement, so other plants may need more than some.
Check on the specific requirements for each vegetable plant.

Our fabric garden containers are the fabric ones because we always water until we see the water start to come out of the fabric.
This is a fool proof guide of knowing how much to water for each vegetable plant.
Container gardening is really a good option for just about every vegetable plant. You might wonder about some plants that grow really large and how to support them.
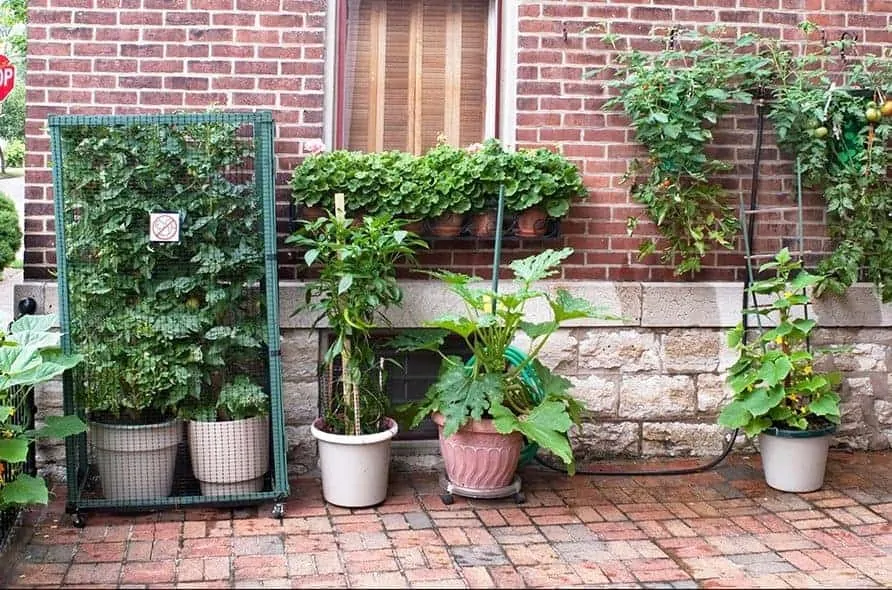
In our garden we use a variety of methods to accommodate this. You can still use your cages if you are able to have them dug into the ground much like traditional garden beds.
Another method is to stake them up using the Florida Weave method found here.
That’s all well in good if you have soil or the ground to burrow in, but what about my porch or concrete..what do you do?
Those of you without any way to support these using traditional methods can simply use 5-gallon buckets filled with dirt.
You can fill it with some soil and rock and devise a staking appratus with this if you really need to.
Other ways to get around this is to have your vegetable garden containers next to a structure that you can build a trellis on.
In years past, we used our railing as a way to secure a trellis.
You just have to get creative on your options for your container gardening trellis needs.
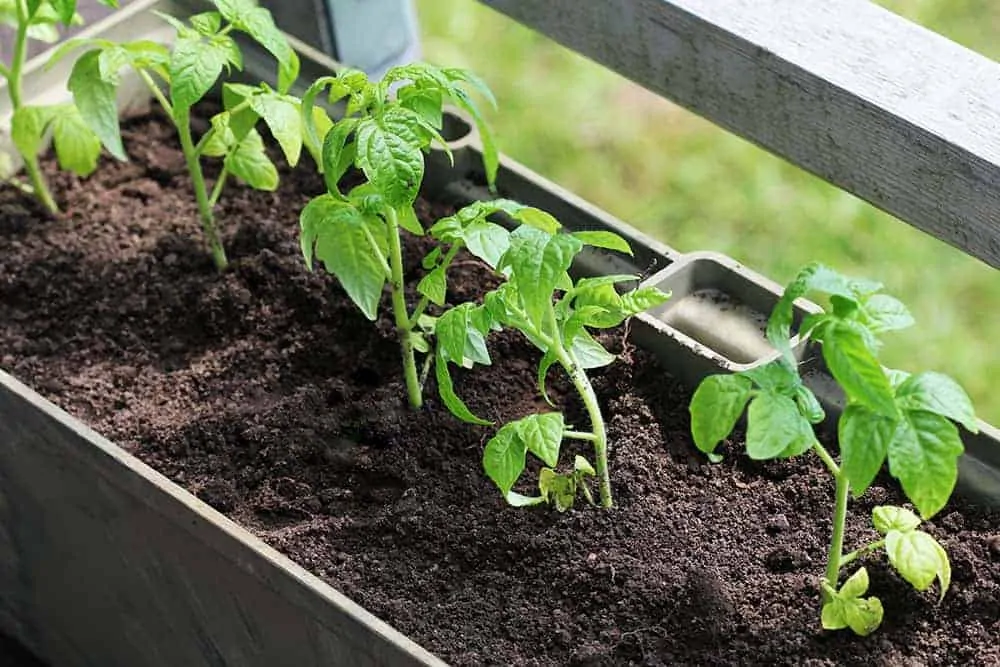
The same preparation that you do to transplant or directly start from seed your vegetable plants applies to your container garden.
We will run through these steps to make sure you understand.
Clean & Rinse – You want to make sure you start with clean or new containers.
Each container should be thoroughly rinsed with a solution of 1 part bleach to 9 parts of water to kill all the nasties.
Drainage – Ensure that you have proper drainage hole in your container
Soil – Add your perfect mix of soil to the garden container. Fill the container up as much as possible.
Fertilizer – Check your specific vegetables to see what each one requires. It is best to add
Planting– Plant or transplant your vegetable plants or seeds into the container
You don’t want to damage the vegetable roots and want to ensure that it gets a good start in your container.
Following these tips will help minimize the shock for the plant when transplanting it into your container.
Water your plants prior to transplanting. This will ensure that it is easier to move and your plants roots are watered.
Size up your container and make sure that you have the container filled in with more soil at the bottom if the new container is larger
Make sure that you also water the plant after it is transplanted and keep it moist for the next few days.
It is best to leave your vegetable plant out of the sunlight for the next day or 2 to help minimize the shock if possible.
You can use shade cloth if you are unable to move the container.
Pretty much any vegetable can grow in a large enough container. Here is a simple guide as to the minimum container size for vegetables
The biggest threat for vegetable plants in containers is the constant attention you need to give with watering.
Staying on top of this will greatly ensure your vegetables will grow successfully.
Here are a few other tips that will help you raise successful tomatoes & peppers into the crops you will love.
Establish a schedule for feeding your container garden plants and stick with it.
Plants in containers may need a bit more liquid fertilizer to help them along.
Mulching your plants in containers will help keep it moist.
It will help to lessen the chances of the container drying out in between waterings.
Don’t forget to harvest your vegetables when they are ready.
This will help to ensure that your plant will continue to grow more vegetables if picked regularly.
Plus isn’t harvesting the whole point of gardening.

Green thumb Gardener is a participant in the Amazon Services LLC Associates Program, an affiliate advertising program designed to provide a means for sites to earn advertising fees by advertising and links to Amazon.com. As part of this Amazon Associates program, the Website will post customized links, provided by Amazon, to track the referrals to their website. This program utilizes cookies to track visits for the purposes of assigning commission on these sales.
Privacy Policy | Disclaimer | Terms of Use
SEO & Web Design by Evergreen Growth Marketing
Sitemap