Vermicompost vs Compost


About the Author: Jeremy Starke
I've been growing vegetables since I was 12 — over 30 years in the dirt. I share what actually works in my own Zone 6b garden, and what I wish someone had told me when I started.
Zone 6b · North Carolina · Gardening since age 12Gardening can be a very exciting venture if you have the patience and stamina to endure preparing your plant beds, nurturing your seedlings and most important of all, choose the best composting method. Why?
For me, no compost for my soil is like having no water for the soil. No compost, no plants and no veggies.
Fortunately we have many options. We will examine two of these vermicompost vs.compost.
What is Traditional Composting?
There are many ways to compost using traditional methods. Understanding the different ways will help you understand the process of traditional composting.
Let’s examine a few tried and true options that will help get the job done.
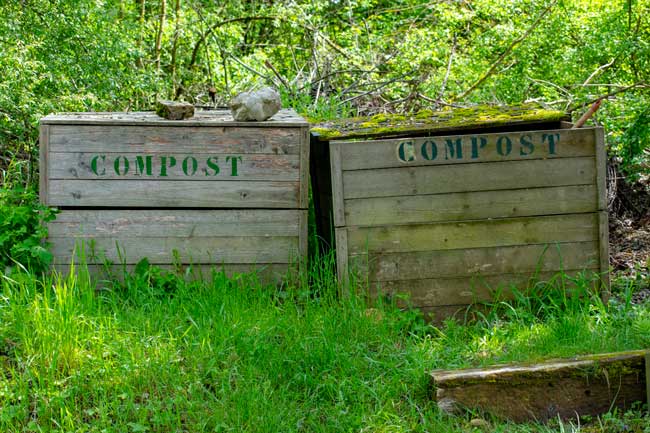
Traditional Compost Pile
Normally, a traditional compost pile is located outside a home that operates through the presence of air greens like food waste, such as food waste, browns such as dried leaves, sun, and water.
Phosphorus – 1.55% to 2.25%
Flowers and roots are an integral part of plant life and growth and transformation processes are needed by plants to develop their flowers and roots.
This is the job for phosphorus which activates changes to RNA, DNA and enzymes and also increases plant resistance to diseases.
All three are essential for the proper growth and health of your plants.
What Else Does It Add?
Vermicompost adds more nutrients in the form of:
- Microorganisms
- Hormones to energize plant growth
- Enzymes
- Micro-nutrients
Amazingly, it has the ability to hold onto these nutrients in the soil over a long period of time. Traditional compost is not able to make both macro and micro nutrients or hold them over long periods.
Bacteria Produced by Worms
Traditional composting produces thermophilic bacteria while mesophilic bacteria are produced by the vermicomposting method.
Thermophilic bacteria love hot temperatures of over 40° C and above, on the other hand mesophilic bacteria like lower temperatures of between 20° C and 45° C.
It’s useful to remember that in traditional composting, both thermophilic and mesophilic bacteria are active at different phases of decomposition. The mesophilic bacteria are active during the first phase of decomposition with temperatures below 40° C.
As temperatures rise, the thermophilic heat loving bacteria take over.
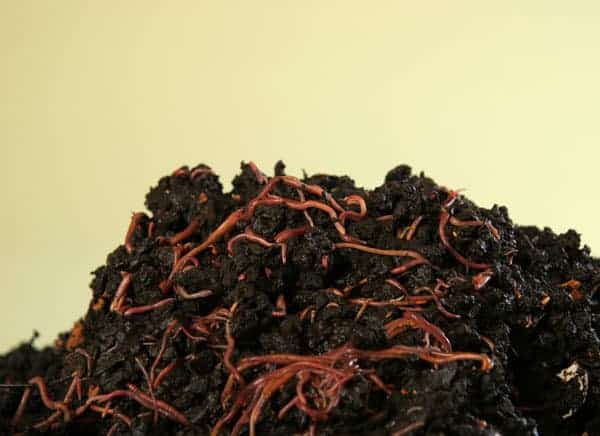
Vermicomposting occurs in two phases, an active stage and a maturation phase where microbes and worms decompose organic matter. The maturation phase occurs when the red worms move up to feast on the newly delivered food scraps and waste
6 Things To Consider Between Both Choices
1.| Pace of creating compost
There is also a difference in the time taken to produce compost when using the two methods of composting. Traditional composting requires about 8 weeks and another 4 weeks for curing or break down of non-decomposed remains after composting.
Vermicomposting takes less time to complete composting and doesn’t need a period of curing because the worm castings are already in a cured form that is they are of very fine texture.
2.| Compost texture and structure
Vermicompost is of finer texture and structure than ordinary compost and the nutrients produced and can be immediately used by your plants and of course contains a more diverse and more numerous microbes than ordinary compost.
3.| Composting sites
Vermicomposting can be carried out outdoors as well as indoors in the house or in an apartment.
Standard composting can only be done outside where food scraps and other food waste is carried to a bin outside or a tumbler or open aired enclosure.
4.| More or less work
Both vermicomposting and ordinary composting require work at different stages of development.
In the early stages, worms in their bedding need to be monitored carefully to ensure they are enjoying their bedding and have developed their access boroughs from the bottom to the top. It becomes a cinch after that..
On the other hand, traditional composting requires continuous aeration until the maturation stage is reached and the temperature within the pile has subsided and further work will need to focus on harvesting the mature pile of compost after about a year since starting.
5.| What About Costs?
A traditional compost pile can begin without much startup investment while vermicomposting requires a small investment for materials and equipment such as building the worm bedding and getting the vermiculture container or bin.
You can circumvent this expense by building your own bin but you’d have to purchase the materials for it. It’s fair to say vermicomposting will cost to get it off the ground.
6.| Harmful Bacteria
The ability of traditional composting to eliminate harmful bacteria is high while that of vermicomposting is low.
The range of temperatures produced by ordinary composting is greater than vermicomposting and hence the former is able to destroy many harmful bacteria during the active stage of the composting when temperatures rise over the 65° C

How To Get Started With Vermicomposting
Setting up a vermicomposting systemic undertaking is never a daunting exercise.
You just need a small manageable container in your kitchen to deposit all the food scraps and wastes and what not.
It’s not that simple for traditional composting. You’ll need space outside the house for placing a suitably sized container for the scraps and other throwaways.
Learn more to boost your confidence on composting.
Containers
There is no need to look for deep containers when you are aware that red worms, which are the best worm species for composting, munch away in the upper layer of their bedding.
Finding a container with a depth of between 8 to 12 inchers should be perfect for your vermiculture. Alternatively, you can make your own container.
It really doesn’t matter where you place your worm container when you live in an apartment or your own home.
Some ideal places include the space under the kitchen sink, tucked away in your closet or workroom. It’s not possible to do this when you decide to do your composting the traditional way.
Bedding
Red worms are fussy about where they live as they love plenty of air, plenty of moisture and the right kind of material which they can wiggle around and through. They are comfortable with:
- Peat moss
- Shredded cardboard
- Worm bedding bought from the store
- Shredded paper for example computer paper or newspaper or both
If you have say a 2-by-2 foot container, the ideal amount of bedding material should be between 4 to 6 pounds in weight and always keep in mind that initially, two thirds of your container should be filled with the bedding material mentioned above regardless of the size.
Want more help on bedding?
Let’s discuss it one step at a time:
- Put dry bedding material (paper, cardboard, peat moss) in a big container with holes
- Cover the dry bedding with water
- Allow the bedding to absorb as much water as possible
- Squeeze the water out of the bedding material
OR
- Simply wet the dry bedding
- Squeeze excess water from the saturated bedding
- Place the bedding in the vermicomposting container
- Then place the bedding in the worm bin making sure it’s moist when you add it in the bin.
Ideal Worms for Vermicomposting
Most worms depend on garden soil for nutrients, but as already mentioned, red worms are ideal for vermicomposting and they can be the first residents of the worm bedding you’ve just created.
For their rent they can create the vital compost you desperately need for your veggie plants or other plants.
Red worms also survive in temperatures between 55° F and 77° F, they feed near the surface off the scraps buried just under the container surface. Keep in mind that the temperature of the bedding should not be over 84° F or below freezing.
Extreme temperatures slow down worm feeding and propagation and worms will die at temperature extremes. You may scatter the worms at the top of your compost bin.
Adding Kitchen Scraps
What constitutes these? Your kitchen waste, fruit waste, veggie waste, coffee grounds, tea bags and eggshells but don’t include bone, meat scraps and pieces of fat.
Remember that bacteria needs time to form so don’t add too much scraps too quickly to avoid an unpleasant odor from your bin. Chop the materials into smaller pieces so the worms can handle them easier.
Harvesting Worm Castings
What are worm castings? They are the transformed scrap wastes in the vermiculture bin that passed through the guts of red worms and out the other end as excretion or worm castings.
This is the wonder fertilizer that accumulates in your bin that contains the macro and micro nutrients. After 3 to 4 months, you should start harvesting the worm castings from you bin to achieve a balance in this way:
- Shine a light into the bin and the worms will wiggle themselves downwards as they are sensitive to light.
- Remove the upper layer of worm castings with your hands or a sieve. Put back any worm eggs and wrigglers back into the bin.
- Refill the top part of your bin with kitchen scraps and waste and more bedding material (no glass, aluminum foils, plastics, rubber bands and the like in the bin and NO insecticides around you bin. Yes, they may kill pests but they will also kill your worms.
This type of continuous compost harvesting is different from harvesting compost produced by the traditional method of composting where the whole compost is harvested once and restarted again.
Check out how easy it is to harvest using the Hungry Bin Flow-Through Worm Farm
Which Way to Choose?
Only you can best decide which composting method to opt for based on the information provided including of course the specific conditions that prevail where you are located.
Nevertheless, I think you’d agree with me that the most important factor is the product that comes out of the two methods of composting as to whether or not they align with your own specific circumstances and what your needs, desires and aspirations are.
Final Thoughts
Composting of whatever nature is a definite boost to any gardening venture of any kind whether it is home based or on a community level.
Whether a choice is based on a comparison of two different types of composting methods such as Vermicompost vs Compost is made, both have been tested and used and are therefore real and fruitful.
Meet Jeremy Starke
I've been growing vegetables since I was 12 — over 30 years in the dirt. I share what actually works in my own Zone 6b garden, and what I wish someone had told me when I started.
Zone 6b · North Carolina · Gardening since age 12 Read My Story →Frequently Asked Questions
What is the difference between vermicompost and compost?
Vermicompost is made by worms eating organic matter, while traditional compost breaks down through heat and microbes. Worm castings are richer in nutrients, but compost handles larger volumes.
Is vermicompost better than regular compost?
Vermicompost is more nutrient-dense and gentle on plants, while regular compost is easier to make in bulk. Many gardeners use both for different purposes.
Which composts faster, worms or a pile?
Worm bins can produce finished castings quickly in small batches, while a hot compost pile processes far more material at once. It depends on your volume and space.
![Best Fertilizer For Pumpkins [Grow Big Guide]](/wp-content/uploads/2021/03/best-fertilizers-for-pumpkins-00.webp)