How To Prepare Soil For Planting Vegetables [Black Gold]
![How To Prepare Soil For Planting Vegetables [Black Gold]](/wp-content/uploads/2020/10/how-to-prepare-soil-for-planting-vegetable-00.jpg)

About the Author: Jeremy Starke
I've been growing vegetables since I was 12 — over 30 years in the dirt. I share what actually works in my own Zone 6b garden, and what I wish someone had told me when I started.
Zone 6b · North Carolina · Gardening since age 12I’ve always been concerned about making the right preparations before doing anything. So, I took that energy along when trying to plant veggies.
However, one area that I realized came with quite some stress was preparing my soil. I bet I’m not the only one wondering how to prepare soil for planting vegetables.
Well, that’s why I’ve put together this article. Here, I’ll tell you all you need to know.
Let’s dig in!
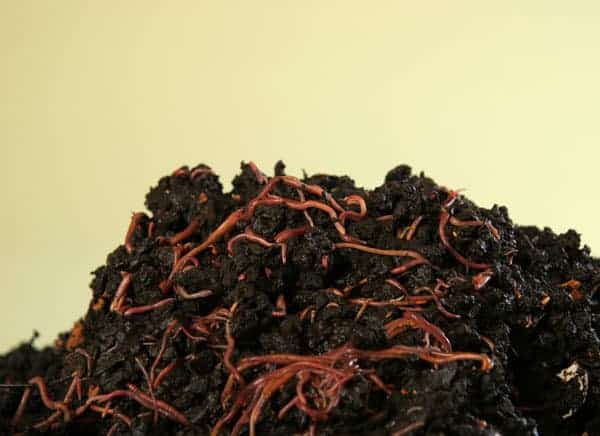
Your Current Soil Health
Just before you get into planting, your soil health is one thing you need to pay attention to. And I bet you can tell why. Just like you, they only perform great when they are in good health.
So, here are the components of your soil health.
Nutrients
Well, your soil health depends on the availability of the various nutrients that it needs. Typically, your soil contains certain nutrients that your plants need to grow.
Now, where these nutrients are present, then your soil is in good health. Otherwise, you’ll need to do something about your soil.
Just so you know, the primary nutrients that make up your soil are potassium, nitrogen, and phosphorus. On the other hand, secondary nutrients include calcium, sulfur, and magnesium.
Other micronutrients such as copper, boron, zinc, manganese, cobalt, and iron perform specific and relevant functions.
pH Level
Also, beyond the soil nutrient, another aspect of soil health is the pH level. This refers to the acid-alkaline level of your soil.
It’s crucial as it’s critical to loads of soil functions, such as a plant’s capacity to absorb necessary nutrients. Usually, your soil needs to be between 6.0 to 7.0 for a good result. Although 6.5 is what’s ideal.
Testing Your Soil
Another important aspect of getting your soil ready for planting is testing it. The goal of this is to under use the current situation of your soil.
I bet it’s starting to seem all complicated. Well, don’t let it be. Here’s a step-by-step guide through which you can easily test your soil.
Step 1: Pick a Location
The first step is to pick the area where you plan to plant. And this is perhaps the easiest of what you’ll need to do.
However, one important thing here is to ensure that the area you pick gets enough sunlight. You’ll need somewhere that gets between 6 and 8 hours of sunlight each day. This is because your veggies need adequate sunlight to grow properly.
Then, once you do, stake the four corners of the area. This way, you don’t miss where you pick.
It would also be best to ensure the area is a minimum of 40 to 50 square feet. This way, there’s sufficient room for multiple vegetables.
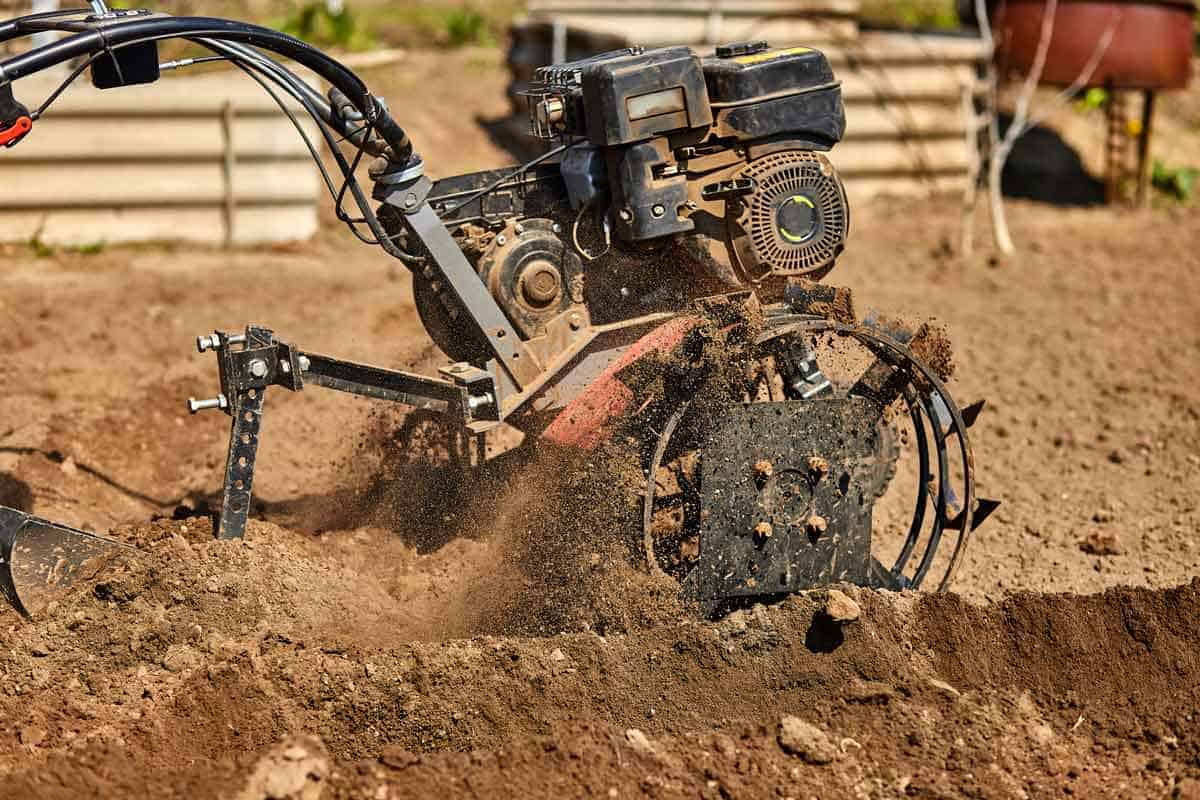
Step 2: Loosen Your Soil
Now that you’ve picked an area, you’ll need to loosen the soil. And reaching a depth between 8 and 10 inches.
For you to do this, use a shovel or straight spade to dig the ground. Remember to go 8 to 10 inches into the soil.
Then, turn your soil over. The goal is to get the topsoil to the bottom. Do this throughout the area and ensure your soil has the same consistency and size.
However, remember to remove any sod or grass before you begin digging. And confirm there’s no electrical wire underneath the area.
You can always decide to use a mechanized cultivator or tiller to increase your speed.
Step 3: The Crumbling Test
Now, wear a glove and hold some soil with your hand. Afterward, squeeze the soil.
Here, you need to confirm if your soil forms a loose ball. And then crumbles immediately, after you squeeze hard. If it does, then you’re good to go as you’ve got a loamy soil.
However, if it doesn’t, and creates one hardball, then you’ve got clay soil. In this case, it’s an issue as it’s too thick to grow your plant properly.
If you’ve got a soil that doesn’t even make a ball, then it’s sandy. Once again, it’s not the best option for your plant.
Now, you can always do this in multiple locations to get the best-suited soil. Don’t worry; your soil structure isn’t always the same.
Step 4: Test the Soil’s Nutrients
You need to know the nutrient composition of your soil before you get into planting. And this is essential if you want to get the best results.
For you to do this, you’ll need to get soil samples, as much as ten scoops from different places in your area. Then, mix them properly until you’ve thoroughly combined them.
Afterward, apply the soil test kit with the guide provided. Don’t stress; you can always get a test kit from your local gardening stores. You can even order them online.
However, just for your ease, you’ll need to do the following when you get the kit.
- Place the soil in the container provided by the kit.
- Open up the capsules in each category.
- Pour water into the container and shake it until there’s a color change of the water.
- Then, match the color with the nutrients and pH facts of that color. You’ll find it on the test kit guide.
With this, you’ll get the pH level, nitrogen, potassium, and phosphorus level of your soil. Still, remember that you need a somewhat acidic soil between 5.8 to 6.5 acidic level.
Step 5: Test the Soil’s Drainage
For you to do this, you’ll need to put a hole in your soil. Ensure the hole is 12 inches deep and 12 inches in diameter.
Then, pour water inside using a hose. You’ll now need to let the water drain through the night. You can then fill it up again.
You should then measure the soil’s water level following an hour. Typically, proper draining should drain 2 inches every hour.
Remember that if your water drains too fast, your veggies won’t get adequate water. However, if it’s too slow, then your veggies will get waterlogged and might develop rot.
Knowing Your Current Soil Type
When I was telling you about testing your soil, one thing I mentioned was about your soil type. Yes, the crumbling test.
Well, one thing you need to know when preparing your soil is your soil type. And this is very important because it will determine the actions you need to take. Sometimes, even as to whether you need to improve your soil.
Well, there are three types of soil that you’ll come across in your planting journey. I’ll tell you about them right away.
4 Tips to Get Started | Breaking New Ground
In no time, you’ll need to break new grounds with your veggies. However, this can sometimes turn out to be challenging.
I’ve been there, and I can tell you, there are various ways to make things easier for yourself. Well, here are some.
Raised Bed
You can always revert to a raised bed. And this is quite useful as it solves loads of your soil problems.
It’s quite simple. Rather than contend with your soil, you can get a raised bed. With it, you can then get the proper soil you need and pour it inside.
Yes, you’ll need to spend more. However, you can avoid the intense labor that you would have gone through.
Irrigation
As you must already know, your vegetables depend on water. And that’s where this comes in.
You can add an irrigation system that ensures your veggies get a steady supply of water. Even more, it allows you to reduce the risk of diseases associated with wet foliage.
Seedling
Your seeds are an important component of your planting. You use a bad seed, and you’re sure to record bad results.
So, ensure that your seeds are fresh and viable. Also, ensure that you abide by the planting depth requirement. This way, you avoid germination issues.
Weeding
You don’t want weeds on your soil when planting. Your best bet will be to ensure that you clear them away before you get to planting. And ensure you clear them in their early stage.
However, it’s not just about the surface. Instead, it’s about their root. So, ensure that you pull their roots from the soil.
Final Thoughts
Your soil is a major component of your planting journey. After all, it’s where you place your plants. Without it, there’s practically no way that veggie is coming to life.
Well, that’s why you need to prepare and care for it properly. I’ve run through all that you need to keep in mind.
So, get going, properly prepare your soil, and enjoy a bountiful yield this time.
Meet Jeremy Starke
I've been growing vegetables since I was 12 — over 30 years in the dirt. I share what actually works in my own Zone 6b garden, and what I wish someone had told me when I started.
Zone 6b · North Carolina · Gardening since age 12 Read My Story →Frequently Asked Questions
What Is the Best Soil for Vegetables?
The most suitable soil for veggies has loads of organic matter and compost such as aged bark, composted leaves, or shredded leaves. The idea is to ensure that your soil isn’t compacted or sandy.
How Do You Prepare Bad Soil for Planting?
In case you’ve got a poor soil, you should try a raised bed that you can then fill with a well-adjusted soil mix. You can also add organic matter to improve your soil’s structure and move it from sandy-like to loam-like.
![Best Fertilizer For Pumpkins [Grow Big Guide]](/wp-content/uploads/2021/03/best-fertilizers-for-pumpkins-00.webp)