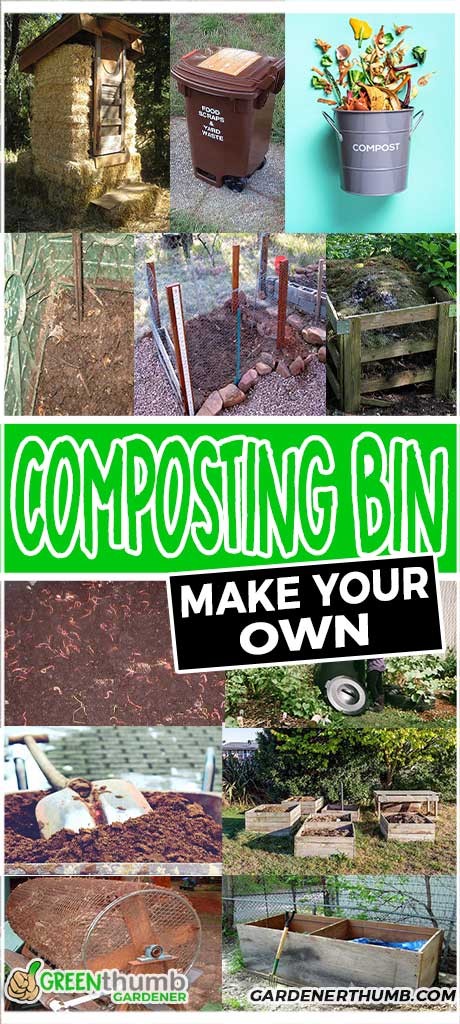
Make Your Own Composting Bin [12 Easy Ways]

About the Author: Jeremy Starke
I've been growing vegetables since I was 12 — over 30 years in the dirt. I share what actually works in my own Zone 6b garden, and what I wish someone had told me when I started.
Zone 6b · North Carolina · Gardening since age 12Do you have to spend big on fancy compositing systems? It might not be necessary. You can make your composting bin to make you a rich soil amendment from kitchen and garden wastes.
The best part of it is that you decide on your compost's design, shape, and size. Without wasting much time, let’s dig into 12 compost bin ideas common in the garden.
12 Compost Bin Ideas
1.Trash can compost idea
The trash can compost method is one of the most affordable and most straightforward ways to make a compost bin at home.
The bin is of small size, making it easy to move to any part of your garden. When preparing for one, ensure you have the right materials. There are plastic and metal options to choose from.
Use a ½-inch twist bit to drill holes on the sides of the garbage and in the bottom.
Position it where you can reach it easily. Then add raw compost materials. These include raw vegetables, grass clippings, plant materials free from disease or pest attack, and dried leaves.
Do not use woody plant materials as they may not decompose.
This bin is aimed at enriching your soil after a few weeks. This means you have to turn the compost after every 2 weeks.
You can do it merely by locking the lid and laying it down on its side. Then roll it around. You can as well, use a rebar or a bulb auger to stir the compost.
2. Wire Mesh Compost Bin
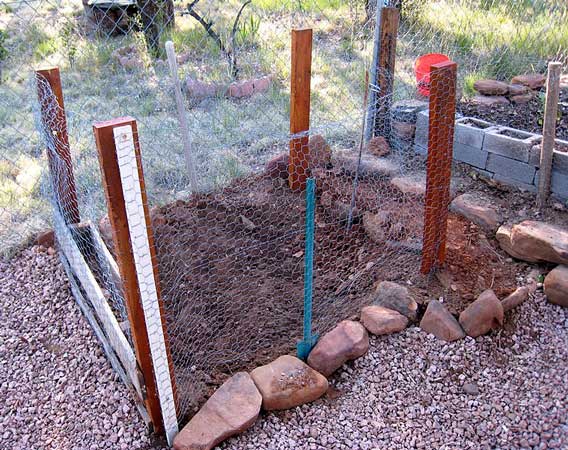
A wire mesh compost bin allows you to have a compost of your preferred size. Before making one, you should consider the available space and the place you want to set it. This method of composting is best when used in a garden with a spacious area.
You can find the materials to use in making one quickly. Go to the local hardware store for poultry wire and some wooden sticks. You can get the tools for the job from your garage. If you lack any of the tools, you can also make an order.
The next thing is deciding the area to lay your compost. Wire mesh compost bins contain a lot of spaces that expose the materials. To avoid losing all moisture, set your compost in a shady area away from direct sunlight.
Then you can now set your compost in the size and shape of your choice. If you make a small and portable compost bin, you might not need the wooden sticks. On the other hand, when making a bigger compost, use wooden sticks to keep the compost sturdy.
3. Plastic Storage Container Compost Bin
If you do not have too much space or want to start composting on a small scale, the plastic compost bin will suit you.
Look for a plastic bin with a lid. It would be helpful to have two bins as one will capture any excess water used as fertilizer for your garden. The bins should have a volume of at least 18gallons.
Prepare the bin by drilling holes on all sides of the bin, including the lid, keeping the holes 2 inches apart.
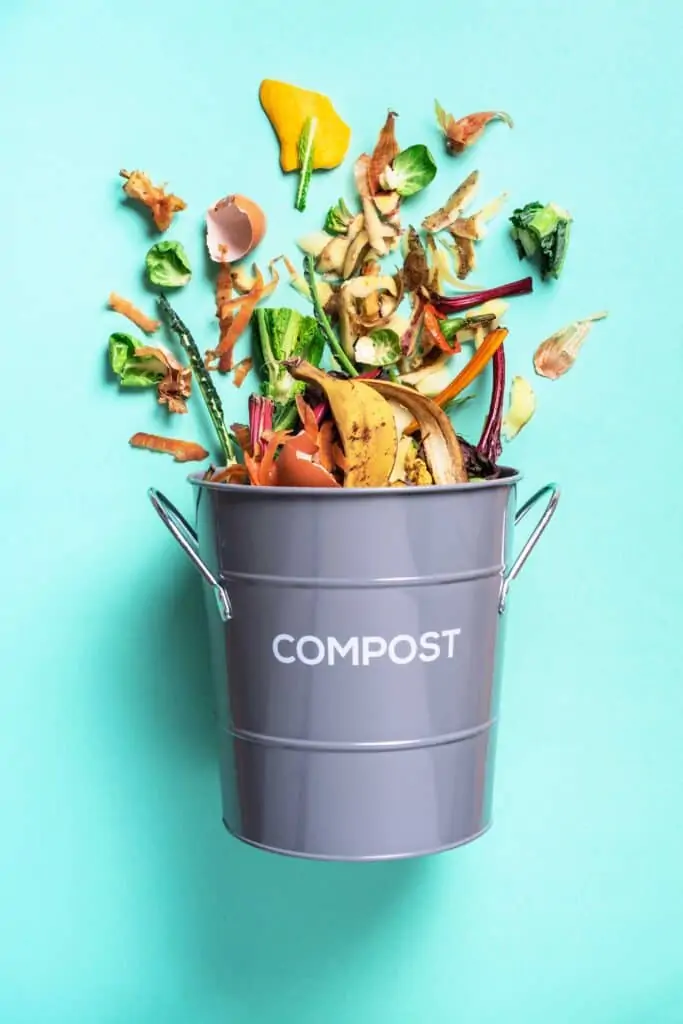
If the holes are too broad, line the bin with wire mesh to keep out pests. Add leaves, vegetables and fruit peels, tissue papers, coffee grounds and filters, eggshells, and anything added to a regular compost pit.
Ensure that all these materials are chopped into small pieces. Then place the bin in your preferred location.
The bins are small in size and will have enough room in most places, indoors and outdoors. To maintain the bin and keep it aerated, give it a shake. You can add dry materials such as sawdust if it's too wet. For a bigger bin, a tool from our roundup of the best compost aerators makes turning the pile a lot less of a chore.
If it's too dry, use a spray can to add some moisture at regulated amounts.
4. Straw Bale Compost Bin
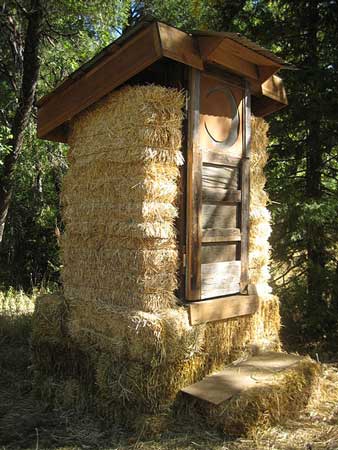
This is another composting method you can use to eliminate unwanted organic material and enrich your soil at the same time. You can come up with one by putting your household waste in a pile in the garden.
Surround the intended area with bales stacked over each other to your desired height, making a box.
To make the walls more robust and sturdy, stagger the bales when stacking them over each other. Simply put, place one bale on the point where the two lower bales meet. This will ensure that there is no continuous vertical gap between bales.
The best thing about this type of bin besides its ease of construction is the fast decomposition rate. The straw helps insulate the bin, keeping the moisture and heat at desirable regular levels.
You can also choose the desired size of the bin as well as adding the decomposed straw into the compost as a rich source of carbon.
There are some cons associated with the straw bale compost bin. The straw bales are heavy and costly to transport. Once the straw bales start decomposing, the walls of the bin look messy.
Thus, they are only preferred to gardeners with extensive gardens to keep them away from sight and maintain the beauty of the compound.
5. 3 Bin Compost System
You can quickly come up with a 3 bin compost system at home by following through simple steps. You can as well decide to buy one.
The 3 bin compost system is ideal for gardeners producing large quantities of plant and food wastes.
In case you decide to build one, you can get 7 pallets, 16d nails, a hammer, a shovel, and a rake. Level your ground using the rake and shovel.
Stand up 2 pallets to create an L-shaped angle and nail them together at the slats. Attach another L-shaped pallet to create an open-faced box with 3 sides. Attach the second and third open-faced box by adding the back and side pallets.
Now that you are done building your compost, start by filling the leftmost box with plant and food waste. Just like other composting methods, turn the materials once or twice a week.
This method lets you have compost fertilizer consistently. Once you have set your bin on the ground, ensure that you always keep weeds in check.
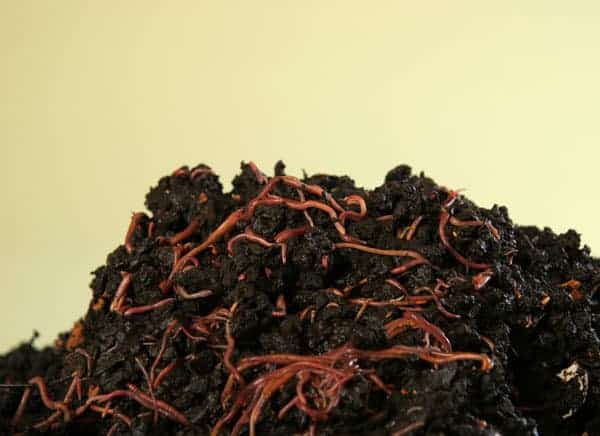
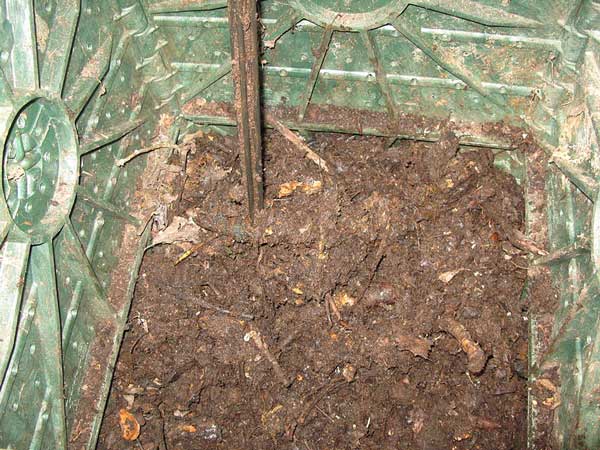
6. Worm Compost Bin
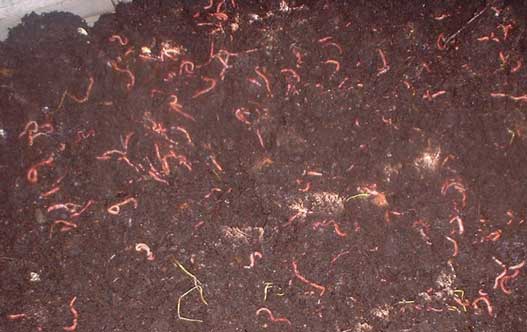
The worm compost bin's best thing is that it produces natural, odorless compost and is easy to maintain with only a weekly dedication of 30 minutes.
This bin can be stored both indoors and outdoors. For the indoor worm compost bin, use a plastic storage bin with a lid.
Drill holes both at the bottom and sides of the bin, keeping them at about 1 inch apart. The holes at the sides allow for air circulation, while those at the bottom give drainage space.
The outdoor bin uses a wood box with spaces and lines it with heavy-duty plastic with holes. Whether set outdoors or indoors, these bins need to be raised.
Use insect and disease-free leaves and straws, shredded paper and cardboard, and egg cartons to make the worms' bed. Add a scoop of soil on top of the bed, then add some water. The worm compost bin's success is mostly dependent on aeration, darkness- worms do not need light- and drainage.
If the compost gets too moisturized, add some dry materials such as sawdust. When it feels too dry, use a spray can to splash water evenly on the materials.
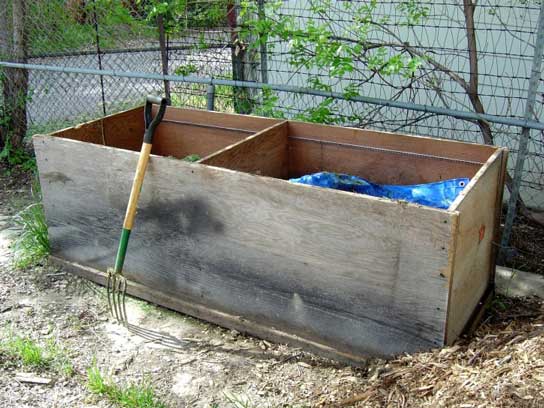
7. Wood Compost Bin
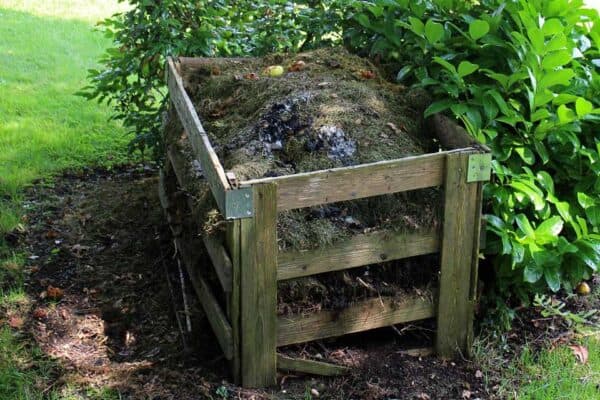
These will not only be composting instruments but will also make your garden attractive. There are several designs to choose from, but they all have the same features: a wooden frame and chicken wire.
It is preferable to go for a wooden compost bin with more than one compartment. Here is why; you can separate the compost according to decomposition extent.
For the small scale compost producers and others who do not have many compost materials, some compartments may be used to hold some garden equipment.
If you prefer this type of compost bin and are stuck on whether to go for a wooden or mesh bin, remember that the same organisms causing the decomposition of the materials will also affect the wood.
It is advisable to line the wooden bin with mesh as it is also effective at keeping away pests.
Consider the amount of room available in your garden and the amount of debris produced when determining size.
8. Compost Tumbler Compost Bin
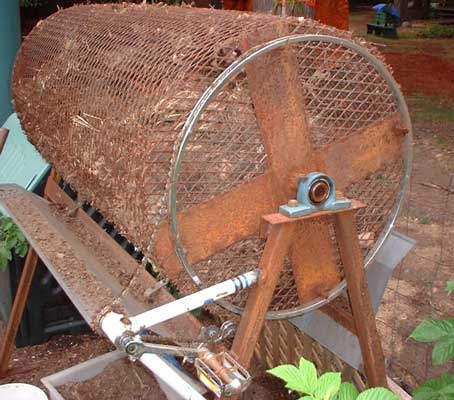
There are a lot of designs that come with a compost tumbler. Some are rolled on the ground, rotated on a base or central axel, and others with a handle. These features make it easy to turn your compost because we cannot turn the compost as often and adequately as we ought to.
Before rushing to buying one, it's essential to know that this type of compost bin requires one complete loading.
You cannot add more materials as this will delay the harvesting period, which is estimated at 3 months after a proper one-time fill-up.
It is the perfect choice for those with back problems and cannot turn compost, those living in rodent-infested areas, and for places that are limited in space. It is also the right choice if you want to get your compost after a short period.
For this type of bin, the materials will not be broken by worms but by bacteria and fungi. The high temperature inside will kill any worms introduced but is essential in killing weed seeds and disease spores within the materials.
The other difference between the compost produced in this type of bin is that it is rough and loose. Most gardeners use this as mulch.
9. Dig And Drop Compost
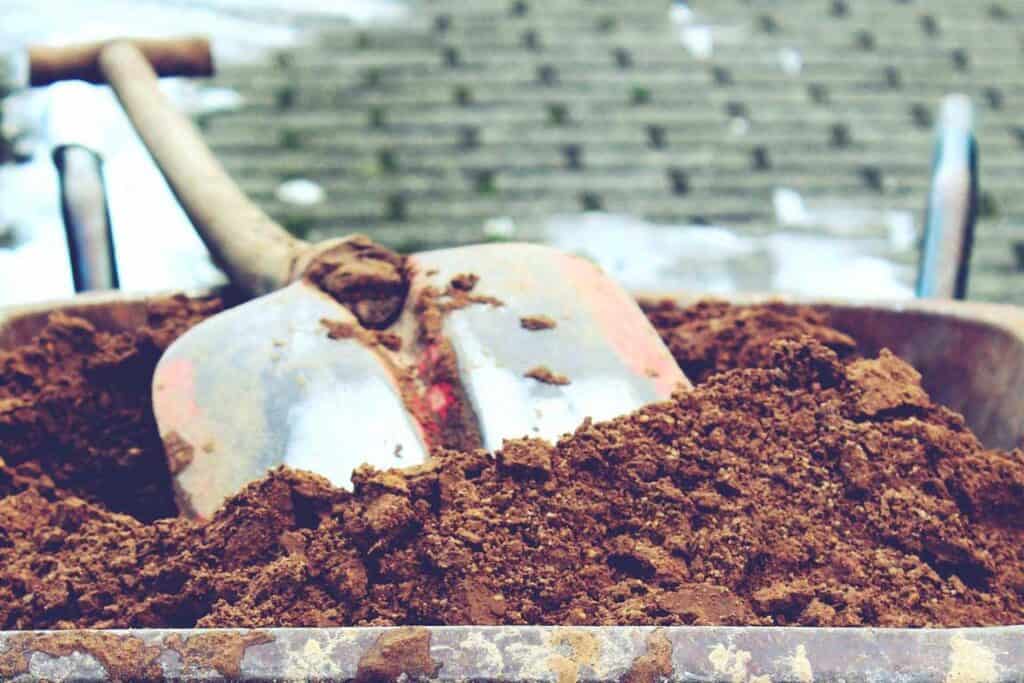
If you want compost for larger farms, this might be the ideal composting option. As the name suggests, dig and drop compost deals with making holes on the ground and filling them with organic materials, covering the holes and forgetting them.
The method is also excellent for composting kitchen waste and garden waste such as weeds. Usually, the materials in this composting trench take around one month to fully decompose to form fertilizer.
With this method, you have the pleasure of composting materials without anyone ever knowing about it. Thanks to its lack of smell, invincibility, and convenience to fit any part of the garden.
Coming up with one is really simple. Dig a trench of around 12 inches deep and add compostable materials up to around 6 inches.
Then bury the materials using the soil you dugout. You can also decide to improve your soil without ever harvesting fertilizer from this method.
This includes making small holes, filling them with organic materials, and forgetting about them. You can gradually make the holes around the garden and fill them with organic materials before covering the holes.
10. Triple Stacked Bin Worm Composting
This is an easy way to produce a lot of nutrient-rich compost in a short time. Most modern people want a worm farm that doesn't take too much space, convenient, easy to use, and neat. This is one type of bin.
This bin's principle is that the compost worm keeps migrating upwards towards the food, leaving its casting behind on its trail. This is unlike the earthworm, which continually goes deeper.
The presence of multiple bins allows you to separate the compost according to decomposition levels. The compost left behind by the worm is collected on the lower bins as more food scraps are added to the upper bins.
Once the lower bins are full, they are emptied and placed at the top, and the chain continues.
You can create a worm bin of any size by altering the number of bins and their sizes. Mostly, you will find these bins at local hardware and supermarkets as ordinary plastic bins.
It is also possible to invent your type of bins using barrels or other materials at your disposal. Since worms hate the light, it's better to go for bulky black bins and get a cover for the topmost bin.
11. Tote Compost Bins

This is relatively easy to make and an excellent budget-saving method of preparing compost. Once you get a tote, drill holes at the top and bottom for free airflow and adequate drainage.
Start by adding some shredded cardboard or leaves at the bottom, filling up about ¼ of the tote. This makes a good base for your compost bin. Then add dirt till it's half full.
Add anything that can go into a natural compost pit, such as eggshells, fruit peels, coffee grinds, vegetable peels, avocado skins, and food scraps.
Sprinkle some water over it and shake. Put your compost in a shady area away from direct sunlight. Too much heat will cause your compost to dry.
Make sure to add some more materials after some days and mix after each addition, which helps break down the materials faster. Wait for two to three months, and you can harvest your compost.
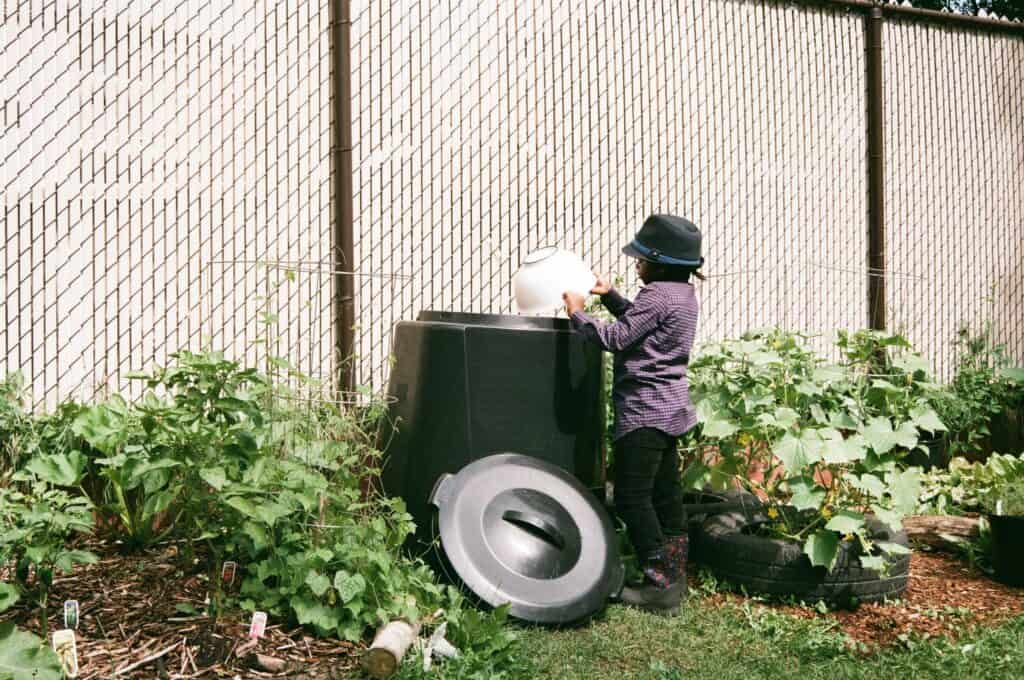
The tote bin is low to the ground, and children can also participate in the composting activity.
12. A Pallet Compost Bin
This is another way to come up with compost at home. With simple pallets readily available, you can enrich your soil in a few days. One thing you need to consider when coming up with a pallet compost bin is the type of pallet to use.
Use the pallets labeled 'HT', meaning they are heat-treat rather than using those labeled 'MB', which have been treated by toxic fumigant, methyl bromide.
You can decide to build any size but go for a standard pallet measuring 48 inches by 40 inches for best results. This size is small enough to permit good air circulation and big enough to allow quick cooking of the materials.
Another vital aspect of pallet compost is the spaces between the slats. Unlike most bins, pallet bins have larger spaces that encourage air circulation. This makes this bin an ideal composting method for aerobic decomposition.
You can make one easily using a few pallets. Ideally, you can use 5 pallets to come up with a bin—four on the sides and one at the bottom. Use zip ties or strong twine to lash your pallets together. Remember to secure only one side of the front pallet to let it swing freely and act as a door for easy turning and harvesting the compost.
Final Thoughts
There are some reasons why we compost the waste from our kitchens and the debris from the garden. For a start, we can make use of the waste. The compost enriches the soil and is an excellent alternative to chemical fertilizers.
For the gardeners, this cuts down on their investment costs.
Purchasing a commercial compost bin is, however, very expensive. There are many ideas that could see you having a not-so-costly bin as many gardeners do.
Mostly it involves recycling readily available items or constructing one.
Using the above compost bin ideas, you can create your own nutrient-rich soil amendment while keeping your garden or yard free of waste.
Meet Jeremy Starke
I've been growing vegetables since I was 12 — over 30 years in the dirt. I share what actually works in my own Zone 6b garden, and what I wish someone had told me when I started.
Zone 6b · North Carolina · Gardening since age 12 Read My Story →Frequently Asked Questions
How do you make a compost bin?
Simple options include a drilled trash can, a wire-mesh ring, a wooden three-bin system, or a plastic tote with air holes. All you need is airflow, drainage, and room to turn the pile.
What is the easiest homemade compost bin?
A wire-mesh hoop or a lidded trash can with holes drilled in it. Both are cheap, quick to build, and work well for a home-sized pile.
Does a compost bin need a bottom?
No. Leaving the bottom open lets worms and microbes move in from the soil and improves drainage. A lid or cover helps control moisture.
![Best Fertilizer For Pumpkins [Grow Big Guide]](/wp-content/uploads/2021/03/best-fertilizers-for-pumpkins-00.webp)